There is nothing worse than breaking a fishing rod tip while out on a fishing session, which leaves your fishing rod unusable for the remainder of the day.
But not to worry, this can be quite easily fixed in most circumstances. If a clean break occurs towards the end of the tip or if you want to replace the old worn-out tip, there are a few quick steps to follow.
What you’ll need?
Spare Rod TipMarine Grade or Waterproof Glue
Fine Grit Sandpaper
Long Nose Pliers

Step 1 – Clean up the rod tip


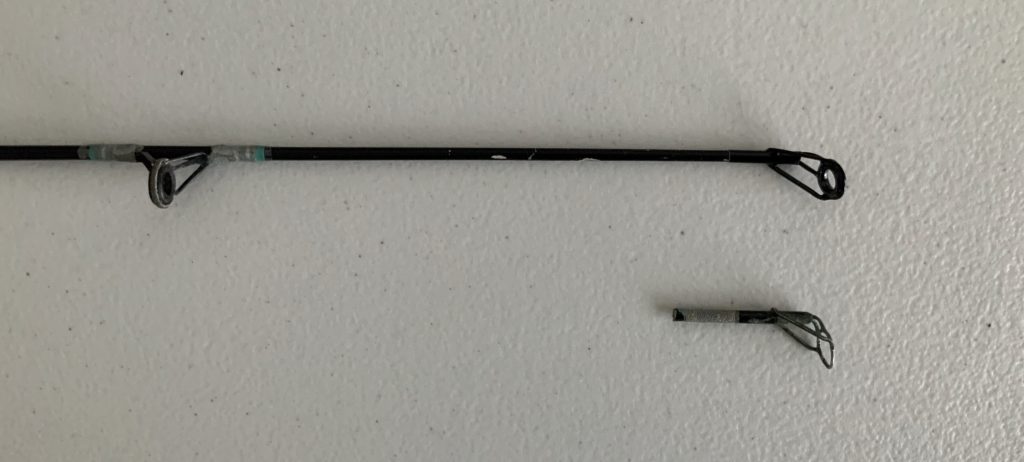
Firstly, we’ll clean up the rod tip by cutting off the excess broken tip with pliers. Ensure a clean neat cut is done as we’ll later secure the new rod tip onto this section.
Step 2 – Sandback any imperfections

By using fine-grit sandpaper, we’ll sand back any imperfections on the tip and also create a rough surface for the glue to bond onto.
Step 3 – Glue the rod surface

Before applying the glue, we’ll use a clean dry cloth to wipe away any dust. Once free of dust and clean we’ll lightly apply a waterproof glue onto the tip of the rod and tightly fit the new rod tip.
Any excess glue may seep from underneath the tip. Wipe away with a clean cloth.
Step 4 – Line up rod tip with the guides

Before the glue has the chance to settle, ensure your new rod tip is aligned with your other guides.
Step 5 – Dry and let the glue cure.
Let the glue cure in a dry area away from any moisture. Curing we’ll be determined by the type of glue you choose to use. In our situation, we allowed 10-12 hours before using the repaired rod.
Hope these tips helped. If you would like to leave any questions or feedback. Please feel free to do so in the comments down below 🙂